How to Clean a Vacuum Brush Roll: Step-by-Step Guide
Learn how to clean your vacuum's brush roll in minutes. Remove tangled hair, restore spinning, and dramatically improve suction and pickup.
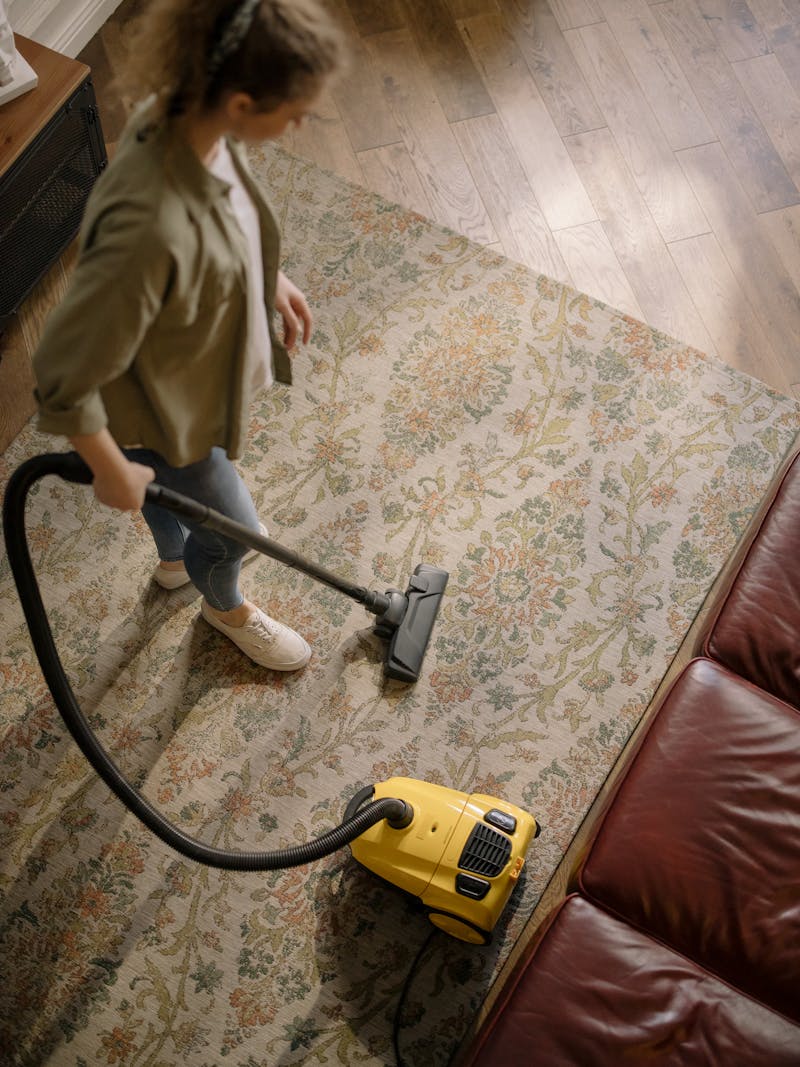
Table of Contents
- How to Clean a Vacuum Brush Roll: Step-by-Step Guide
- Why Brush Rolls Get Dirty — and What That Costs You
- What You’ll Need Before You Start
- Step 1: Turn Off, Unplug, and Prepare Your Workspace
- Step 2: Remove the Brush Roll From the Vacuum Head
- Step 3: Cut and Pull Hair and Thread Tangles
- Step 4: Clean the Bristles and the Brush Roll Surface
- Step 5: Reinstall the Brush Roll
- Brush Roll Cleaning for Different Vacuum Types
- How Often Should You Clean the Brush Roll?
- Signs Your Brush Roll Needs Replacing, Not Just Cleaning
- Frequently Asked Questions
- Quick Reference: Brush Roll Cleaning Checklist
- Top Picks
How to Clean a Vacuum Brush Roll: Step-by-Step Guide
If your vacuum has started leaving tracks of hair across the floor instead of picking it up, or if the roller has gone completely quiet when it used to spin with a satisfying hum, there is a very good chance the brush roll is the problem. A tangled, clogged brush roll is one of the single most common causes of declining vacuum performance — and one of the most overlooked.
The fix is not complicated. In most cases, a thorough brush roll cleaning takes under ten minutes and immediately restores the pickup performance that made you choose your vacuum in the first place. No special tools are required, no technician is needed, and no parts need to be ordered. This guide walks through everything: why brush rolls get dirty, exactly how to clean them step by step, how the process differs for upright, stick, and robot vacuums, and when cleaning is no longer enough and replacement becomes necessary.
Why Brush Rolls Get Dirty — and What That Costs You
The brush roll — also called a beater bar, roller brush, or agitator — is the cylindrical component inside the vacuum head that spins rapidly against carpet pile to loosen embedded dirt, dust, and debris before the suction draws it up into the collection bin. It does this work by rotating at high speed, typically several hundred RPM, with stiff bristles or rubber fins extending outward from the central shaft.
That spinning action creates exactly the conditions needed for tangling. Every time the brush roll passes over carpet, it sweeps up not just loose debris but also anything long and flexible: human hair, pet fur, sewing thread, carpet fibers, dental floss, and shoelace fragments. These materials wrap around the roll in tight, dense spirals that accumulate layer by layer with every vacuuming session.
The consequences build gradually and then become dramatic:
- Reduced agitation. As debris wraps around the brush roll, the bristles are progressively buried. Bristles that cannot extend freely cannot agitate carpet pile. Embedded dirt stays put.
- Motor strain and overheating. A brush roll wrapped with a thick cord of hair requires significantly more torque to spin. The motor works harder, runs hotter, and wears faster. In extreme cases, a fully seized brush roll can burn out the drive belt or trip the motor’s thermal protection cutoff.
- Complete cessation of rotation. When the tangle becomes dense enough, the brush roll stops spinning entirely. At that point the vacuum is essentially a suction-only device with no agitation — fine for hard floors, nearly useless for carpet.
- Odor. Pet hair, skin cells, and damp debris packed tightly around a warm rotating shaft decompose slowly. The result is a musty or sour smell that the vacuum disperses throughout your home every time you run it.
The accumulation rate depends heavily on your household. Someone with long hair, a double-coated dog, or plush carpeting may find the brush roll fully packed after just two or three vacuuming sessions. A short-hair-only household with hard floors might go months before the effect is noticeable.
What You’ll Need Before You Start
You do not need specialized tools to clean a brush roll. Everything required is likely already in your home.
- Scissors — Small, sharp scissors are the primary tool for cutting through hair tangles. Nail scissors or embroidery scissors work especially well in tight spaces.
- Seam ripper — This inexpensive sewing tool has a sharp hook specifically designed to slide under threads and cut them cleanly. It is faster and safer than scissors for getting under dense layers of tightly wound hair.
- Fine-tooth comb — Used after the main tangles are removed to pull out remaining debris from between the bristles. A standard rat-tail comb works well.
- Stiff-bristle brush or old toothbrush — For scrubbing the bristle rows themselves once the bulk of the tangle is gone.
- Dry cloth or microfiber towel — For wiping down the brush roll, the brush roll housing channel, and the end caps.
- Coin or flathead screwdriver — Required for removing end caps on many models; check your specific vacuum’s design.
- Trash can nearby — The debris removal process generates a surprising amount of mess. Keep a bin within arm’s reach from the start.
Step 1: Turn Off, Unplug, and Prepare Your Workspace
Before touching the brush roll, turn the vacuum fully off and disconnect it from power. For cordless vacuums, remove the battery pack if possible. This is not a suggestion — a brush roll that begins spinning unexpectedly while your fingers are near it can cause a painful injury.
Lay the vacuum head upside down or on its side on a flat surface, ideally over a trash bag or newspaper to catch the debris that will fall as you work. Good lighting matters here. A desk lamp or work light positioned to illuminate the brush roll channel will help you see hair tangles and debris that would otherwise be invisible.
Step 2: Remove the Brush Roll From the Vacuum Head
On most vacuums, the brush roll is not glued or permanently fixed — it is designed to be removed for cleaning and replacement. The removal method varies by vacuum type, but the general process is consistent.
Flip the vacuum head upside down. You will see the brush roll sitting in a channel that spans the width of the cleaning head. At each end of the brush roll, there is typically an end cap or bearing mount.
Locate the release mechanism. On many uprights and stick vacuums, there is a coin-slot fastener at one or both ends. Insert a coin and turn a quarter rotation to release. On other models, the end cap clips in and lifts out when you press a tab. Some robot vacuum brush rolls pull straight out once you lift a small latch or remove a cover panel.
Check your owner’s manual if you are unsure. Forcing a brush roll out incorrectly can snap the bearing mount or damage the drive belt. Most manufacturers post PDF manuals on their websites — search your model number plus “brush roll removal” if needed.
Slide or lift the brush roll free. Once both end caps are released, the roll should lift cleanly out of the channel. Set it aside on your work surface. Take note of which direction it faces so you can reinstall it correctly — some brush rolls are directional, with the bristle angle designed to work in only one orientation.
With the brush roll removed, also take a moment to wipe out the channel itself. Debris, grit, and hair often accumulate in the channel ends and bearing seats. A dry cloth or cotton swab is ideal for this.
Step 3: Cut and Pull Hair and Thread Tangles
This is the primary work of the cleaning process and where the seam ripper and scissors earn their keep.
Hold the brush roll horizontally and examine it. On a heavily used roll, you will see distinct rings or bands of tightly wound hair at regular intervals — typically where the bristle rows are, since those are the points that catch and anchor incoming strands. The hair can compress into a surprisingly hard, felt-like mass.
To remove the tangle:
- Insert the seam ripper or the point of your scissors under the outermost layer of the hair mass, working parallel to the length of the brush roll (not perpendicular). Slide it along until you find a gap where you can get beneath a full layer of wrapping.
- Cut carefully through the layer, working in short strokes. Avoid cutting into the bristles themselves — you want to sever the hair, not shorten the brush fibers.
- Pull the cut section away from the brush roll. Depending on how compressed the tangle is, it may come away as a single thick rope of hair, or in sections.
- Repeat for each zone of tangling. Multiple cutting passes are often needed per section on a heavily loaded brush roll.
- Once the bulk of the tangle is removed, use a fine-tooth comb to drag residual hair and short fiber fragments out from between the bristle rows, working from the center of the roll outward.
Be systematic. Work from one end of the brush roll to the other in order, and check each section under good light before moving on. It is easy to miss a dense patch buried under a lighter surface layer.
Step 4: Clean the Bristles and the Brush Roll Surface
With the main tangles removed, the bristles themselves typically still hold fine debris, pet dander, and grit embedded at the base of each tuft.
Take the stiff-bristle brush or old toothbrush and work along each row of bristles, scrubbing from the base toward the tip. This dislodges particles that are packed in at the root of the bristle tuft — the zone that tangled hair presses debris into over time.
If the brush roll has rubber fins instead of or in addition to bristles (common on many modern robot vacuums and some stick vacuums), wipe the fins down with a dry or very lightly damp cloth. Remove any debris stuck to the fin edges.
Inspect the end caps and bearing seats at both ends of the brush roll. These are bearing points that allow the roll to spin freely, and grit packed into them creates friction that slows or stops rotation even after all the hair has been removed. Wipe them clean with a dry cloth or cotton swab, making sure the bearing seats are clear.
A note on water: For most traditional brush rolls, water is unnecessary and undesirable. Getting the roll wet and not allowing it to fully dry before reinstallation introduces moisture into the bearing ends, potentially causing rust on metal bearing seats. Dry cleaning methods are sufficient in the vast majority of cases. The exception is the silicone or rubber brush rolls used on some wet-dry vacuum models — check your manual to see if rinsing is specified for your particular roll type.
Step 5: Reinstall the Brush Roll
Before reinserting the brush roll, do a final check:
- All hair and debris removed from the roll and the end caps
- The channel in the vacuum head wiped clean
- The drive belt (if visible) seated correctly in its groove — if the belt has slipped off, this is the moment to reseat it before the brush roll goes back in
- The brush roll orientation confirmed (check the arrow or directional marking if present)
Seat the brush roll back into the channel, aligning both ends into their respective bearing mounts. Press or click the end caps back into place and secure any coin-slot fasteners. Give the brush roll a manual spin with your finger — it should rotate freely with minimal resistance. If it feels stiff or rough, remove it again and recheck the bearing seats for debris.
Reinstall any cover panels, flip the vacuum upright, and run it briefly on a hard floor to confirm the brush roll is spinning normally before using it on carpet.
Brush Roll Cleaning for Different Vacuum Types
The core cleaning process described above applies universally, but the specifics vary meaningfully across vacuum types.
Upright Vacuums
Upright vacuums tend to have the most accessible brush rolls. The head is typically a single flat unit with a transparent or removable cover that exposes the full length of the roll. Many uprights use a coin-slot end cap release that makes brush roll removal a 30-second task.
Because uprights are the primary carpet vacuum in most homes, their brush rolls often accumulate tangles faster than other types. Households with long hair or shedding pets should plan on checking the brush roll monthly. The brush roll on a typical upright is also longer than on a stick or robot vacuum, which means there is more surface area for debris to accumulate — budget a few extra minutes for thorough cleaning.
Stick and Cordless Vacuums
Stick vacuums vary widely in brush roll accessibility. Some models — particularly those from Dyson, Shark, and Bissell — are designed with tool-free brush roll access as a selling point. Others require a screwdriver to open the floor head.
The brush rolls on stick vacuums are typically shorter and lighter than those on uprights, and many modern designs feature anti-tangle geometry (tapered bristle sections, conical fin arrangements) that reduces but does not eliminate tangling. Even anti-tangle brush rolls accumulate debris at the bristle base and benefit from a periodic cleaning. Check the brush roll every 4 to 6 weeks on a stick vacuum used as a primary machine.
Robot Vacuum Brush Rolls
Robot vacuums require special attention because their brush rolls are smaller, operate unattended, and typically run more frequently than push vacuums. The combination of daily use and no human intervention means the brush roll on a robot vacuum tends to become the most severely tangled of all types.
Most robot vacuums use a side-latching mechanism to release the main brush roll from the underside of the unit. Refer to your specific model’s manual, but the general process is: flip the robot upside down, locate the brush guard or cover over the main roller, release the latch (usually a single clip), and lift the brush roll free.
Robot vacuum brush rolls are often shorter and may come with a dedicated cleaning tool — a small comb or cutting guide — that the manufacturer includes specifically for this task. If your robot came with such a tool, use it; the cutout notch is designed to sever hair at the correct depth without cutting the roll’s surface material.
Because robot vacuums run frequently and operate in areas with pet hair and long human hair, cleaning the brush roll every one to two weeks is not excessive for active households. Many robot vacuum apps now include maintenance reminders — enable them if your model supports it.
How Often Should You Clean the Brush Roll?
The honest answer is: it depends, and most people are cleaning their brush rolls far less frequently than they should be.
As a general baseline, a monthly inspection is a sensible habit for any household that uses the vacuum regularly. During that inspection, if you see any visible hair accumulation, clean it immediately rather than waiting for a scheduled date.
Households that should clean more frequently:
- Long-hair households. Human hair longer than about six inches tangles around brush rolls extremely efficiently. If there are people with long hair in your home, check the brush roll every two to three vacuuming sessions.
- Pet hair households. Medium to heavy shedders — Huskies, German Shepherds, Golden Retrievers, Maine Coons — can load a brush roll significantly in a single vacuuming session during shedding season.
- Households with both. The combination of long human hair and heavy pet shedding is the most demanding scenario for brush roll maintenance. Weekly cleaning may be necessary.
Households that can go longer between cleanings:
- Short-hair households with no pets can typically go two to three months between brush roll cleanings without noticeable performance degradation.
- Vacuums used primarily on hard floors, where brush roll agitation is often disabled, accumulate tangles much more slowly.
A practical rule of thumb: if the brush roll slows noticeably or stops spinning, clean it immediately. Do not wait for a scheduled maintenance date.
Signs Your Brush Roll Needs Replacing, Not Just Cleaning
Cleaning has limits. After extensive use, a brush roll can reach a state where cleaning restores its appearance but not its function. Knowing when to replace rather than re-clean saves the frustration of repeated cleanings that never fully restore performance.
Replace the brush roll when:
- The bristles are permanently bent, matted, or splayed. Bristles that have been deformed by sustained tangle pressure cannot agitate carpet effectively. Even after all the hair is removed, bristles that angle inward or lay flat against the roll will not make proper contact with carpet pile. Run your finger along the bristle rows — they should feel stiff and stand at a consistent angle. If they are soft, crushed, or irregular, the roll needs to go.
- The bristles are worn down significantly. Over time, bristles wear shorter. A brush roll with worn-down bristles loses agitation effectiveness even when perfectly clean. Compare bristle length to a reference photo of a new roll for your model if you are unsure.
- Visible physical damage to the roll body. Cracks in the plastic core, gouges in the surface, or a warped/bent shaft cause vibration, noise, and uneven floor contact. A damaged roll body cannot be repaired — replace it.
- The roll wobbles or is unbalanced. If the brush roll wobbles noticeably during a manual spin check after cleaning, the bearings or the shaft itself may be damaged. A wobbling brush roll transfers vibration through the vacuum head, causes noise, and eventually damages the bearing seats in the floor head itself.
- Cleaning no longer improves performance. If you have done a thorough cleaning — all hair removed, bearing seats clear, belt properly seated — and the vacuum still struggles to pick up debris or leaves visible carpet behind, the brush roll’s agitation capacity is spent. Replace it.
Replacement brush rolls for most major brands are available for $10 to $30 and are straightforward to install. They are one of the highest-value replacement parts you can buy for an aging vacuum.
Frequently Asked Questions
How do I know if my brush roll is spinning?
Turn the vacuum on and look at the floor head from the side. Most uprights and stick vacuums have a small gap or transparent window where you can see the roll moving. Alternatively, hold a small piece of tissue or light debris near the brush roll opening — if the roll is spinning, it will be drawn toward the head noticeably faster than suction alone would pull it. If the roll has stopped, you will hear a change in motor pitch (often a laboring sound) and the vacuum will leave visible debris on carpet after multiple passes.
Can I clean the brush roll without removing it?
You can cut and pull some surface tangles without removing the brush roll, but a thorough cleaning genuinely requires removal. Accessing the bearing ends, cleaning the bristle bases, and clearing the channel properly all require the roll to be out of the machine. Spot cleaning without removal is an acceptable short-term measure if you do not have time for a full cleaning, but it does not substitute for a complete job.
My brush roll was spinning fine and then suddenly stopped — why?
A sudden stop is almost always caused by one of three things: a large tangle that seized the roll abruptly (a longer piece of string or fabric caught and wrapped in a fraction of a second), a broken or slipped drive belt, or the motor’s thermal cutoff activating due to overheating. Clean the brush roll first. Then check the drive belt — it should be intact and seated in the groove, with moderate tension. If the belt is broken or the motor keeps cutting out, contact the manufacturer or a service center.
Is it safe to rinse the brush roll with water?
For most brush rolls, rinsing with water is not recommended unless the manufacturer explicitly states the roll is washable. The bearing ends — the metal or plastic rotating mounts at each end — can rust or seize if water infiltrates them. Dry cleaning with scissors, a comb, and a brush is sufficient for the vast majority of debris accumulation. If your brush roll is genuinely soiled beyond dry cleaning, check the manual for your model before introducing water.
How long does a brush roll last?
Under normal household use with regular cleaning, a brush roll typically lasts two to four years before bristle wear becomes significant. Heavy use, frequent encounters with abrasive debris (sand, gravel tracked in from outside), or repeated severe tangling events shorten that lifespan. Models that use replaceable brush rolls make this calculation easier — replacement rolls are inexpensive and renew the performance of an otherwise functional vacuum.
Does cleaning the brush roll affect suction?
Directly, no — brush roll condition and suction are controlled by separate mechanisms. Suction is primarily governed by the motor, the filter, and the seal between components. However, a seized brush roll forces the motor to work harder, which can cause thermal protection to partially throttle motor output in some models. Removing the load on the motor by cleaning the brush roll can therefore indirectly allow the motor to run more freely and maintain full suction output over longer sessions.
What is the best tool for cutting hair off a brush roll?
A seam ripper is the most efficient single tool for this task. Its hooked blade slides cleanly under compressed layers of hair, and a short pull severs the tangle without risking damage to the bristles. Small, sharp scissors — nail scissors or embroidery scissors — are the most accessible alternative and work very well in most cases. Avoid using large scissors or box cutters in the confined space of the brush roll channel; the risk of accidentally cutting the drive belt or scoring the floor head housing is not worth it.
Quick Reference: Brush Roll Cleaning Checklist
- Vacuum unplugged or battery removed before starting
- Brush roll removed cleanly with end caps released
- Channel and bearing seats wiped clear of debris
- All hair and thread tangles cut and removed with seam ripper or scissors
- Bristle rows combed out with fine-tooth comb
- Bristle base scrubbed with stiff brush to clear packed debris
- Bearing ends at both ends of the roll cleared and dry
- Roll reinstalled correctly with end caps secured
- Manual spin check confirms free rotation before first use
- Belt seated properly in groove (uprights and some stick vacuums)
A clean brush roll does more for carpet pickup performance than almost any other maintenance task. Unlike filter cleaning, which addresses airflow efficiency, brush roll maintenance directly restores the agitation that dislodges embedded dirt — the work that makes a vacuum genuinely clean carpet rather than just skim the surface. Five to ten minutes of maintenance, once a month, is the difference between a vacuum that performs and one that just makes noise.
Top Picks

Bissell CleanView XR cordless vacuum: 200W motor, 35-min runtime, tangle-free brush roll & 3-in-1 design. Top-rated stick vacuum for home. Shop now.

Bissell Featherweight stick vacuum weighs only 3 lbs and converts into 3 machines. Bagless design with crevice tool for carpet, hard floors, and furniture.

Bissell CleanView XR Pet 300W cordless stick vacuum with 40-min runtime, deep cleaning FurBrush, and removable battery. Expert review with full specs.

Bissell Featherweight 2033M is an ultra-lightweight 3-in-1 bagless stick vacuum for hard floors, carpet, and stairs. Converts to hand vac with crevice tool.
Bissell Featherweight 2033 lightweight stick vacuum converts to handheld. Bagless, corded, with crevice tool for carpets, hard floors, and stairs.
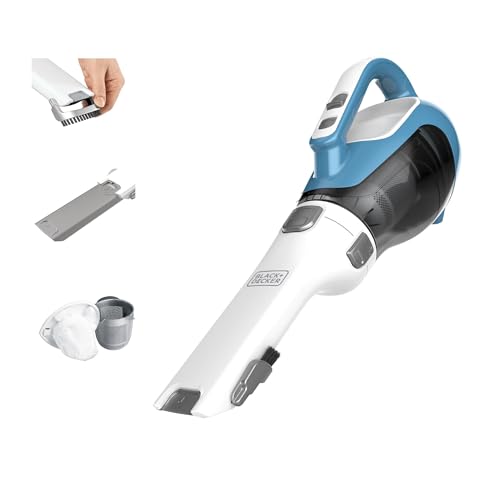
BLACK+DECKER Dustbuster AdvancedClean cordless handheld vacuum with cyclonic suction and 16V battery. Great for home and car. Read our expert review now.
Ready to Find Your Perfect Vacuum?
Browse our expertly reviewed vacuum cleaners and make an informed decision
Browse All Vacuums